 Hardwareby Allan Binder (MUON SORTES) · Adafruit Blog
Hardware · build
A 2.13-inch ePaper tag you update by tapping your phone
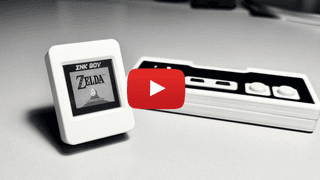
A 3D-printed ePaper tag that swaps its picture over NFC, built around a XIAO nRF54LM20A and a 2.13-inch monochrome panel. The maker says the whole build took about two hours.
Build sheet
- Device page
- Seeed Studio 2.13" Monochrome eInk →
- Board
- XIAO nRF54LM20A
- Display
- 2.13in e-paper 122x250
- Input
- NFC tap from phone
- Case
- 3D-printed
Can I build this?Intermediate · AI 4/5 · $30–50
- Difficulty
- Intermediate
- AI-buildability
- 4/5
- Time
- A weekend
- Cost
- $30–50
Firmware is prebuilt and the source is public, so most of the work is flashing and adapting code, while the soldering, NFC antenna and case fitting are hands-on.
Parts
Tools
3D printercaliperssoldering iron
Starter prompt
Based on "A 2.13-inch ePaper tag you update by tapping your phone" on Afterware: https://afterware.xyz/p/a-2-13-inch-epaper-tag-you-update-by-tapping-your-phone
Write Arduino or Zephyr firmware for a XIAO nRF54LM20A driving a 2.13-inch 122x250 monochrome e-paper panel through a ePaper driver board. The device should accept an image over NFC from a phone, convert it to 1-bit bitmap data, and refresh the display. Include a sleep mode between updates to save battery.
Estimates based on the original write-up. How AI-buildability is scored. Building with an AI assistant? Connect it to Afterware (free MCP server).
Story
The goal was a small tag that shows a new image every time you tap it, with no computer involved. Prepare an image on your phone, push the data over NFC, and the ePaper screen redraws. The maker had the core parts already: a XIAO nRF54LM20A, a 2.13-inch ePaper panel, a battery and an NFC antenna. The hard part was squeezing them into a case that looks like a finished gadget.
The enclosure went through several rounds. The ePaper ribbon cable turned out shorter than expected, which dictated where the display and expansion board could sit, so the maker added two side cutouts and re-measured with calipers. ChatGPT helped generate the 3D model, with chaotic results, and the mounting holes were moved to fit the short cable. A smaller battery went in after the first test fit.
The firmware is the reusable part. The maker posted a project site with ready-to-flash prebuilt firmware, a step-by-step guide and an FAQ, plus the source and 3D files on GitHub. If you already own the hardware, you can skip the toolchain entirely and flash the image.
Featured in
Build an e-ink Claude Code usage dashboardMore like this


More like this
Hardwareby Allan Binder (MUON SORTES) · Adafruit Blog Hardwareby XiaoGai · Hackster